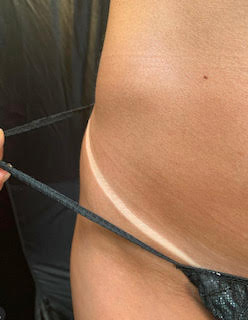
Our 4 Tips When Using Self Tanner
- Tiffany Rose (Owner/President)

- Nov 20, 2022
- 3 min read
Updated: May 4, 2023
As the days grow shorter and the weather gets colder, many of us find ourselves longing for a warm glow to add a little life into our skin. However, spending time in tanning beds is not only a surefire way to accelerate the aging process, but can also lead to skin cancer. Let us help you achieve a healthy, bronze complexion without any of the harmful side effects of UV exposure.
For those of us who have never used self-tanner before, the thought of slathering our bodies in self tanner can be a bit daunting. Will it turn out streaky? Or worse, orange? Luckily, by following these few simple tips, you can avoid any self-tanner disasters and end up with a beautiful, natural-looking tan. Check out our top 4 tips below.

When Using Self Tanner -Exfoliate Correctly
One of the most important steps when using self tanner is ensuring an even application of self-tanner is to exfoliate your skin beforehand. This will help to scrub off any dead skin cells that could cause your self-tanner to apply unevenly. Pro Tip 1: Be sure to exfoliate lightly as anything too harsh could irritate your skin and cause dryness or redness. It is also important to make sure that you are exfoliating your entire body, including often forgotten areas like your knees, elbows and ankles. These are areas where dead skin cells tend to build up easily and can cause your self-tanner to look patchy or unnatural. Exfoliate at the end of your shower with just water after you have washed everything at least a couple hours before application.
Moisturize before hand, the self tanning secret.
After you have exfoliated, it is time to moisturize! This step is crucial for multiple reasons:
First, it helps to create a smooth canvas for your self-tanner to adhere to. Second, it helps to hydrate your skin so that it does not dry out after applying self-tanner (which can happen often). Third, if you are new to self-tanning, it can be a little more forgiving after it develops. Pro Tip 2: Remember to pay special attention to areas like your elbows, knees, and ankles as these are all areas where self-tanner can absorb too much and create an unnatural look.
Application Techniques and Product Quality.
After you have prepped your skin, it is time to start applying! For an even application, be sure to use our professional tanning mitt and our professional tanning mousse. This is where the quality of the product will make a huge difference, not only with the color outcome but also the longevity of the tan and the fade. The mitt will help ensure that your hands do not get stained and will also help blend the mousse into the skin for a more even application. The quality and ingredients of the product will determine your end result and will also allow for easier touch-ups! (a blog on touch-ups with self-tanner to come). Start from the bottom and work your way up. This way, you will not accidentally miss any spots. Be sure to apply one generous pump to each limb, stomach, buttocks, chest, shoulders and back. Grab a loved one for help with your back. The key here is to work quickly in circular motions until the self-tanner is blended in. Be sure to blend really well, skipping feet, hands, and face for now. Once you have applied self-tanner evenly over those areas, you can decide if you want to do another layer. Maybe not the first time, but if you have done this before and want to be darker, go ahead do the steps over for a second coat. Pro Tip 3: If you do a second coat, be sure to skip knees and elbows and blend around those areas. Too much color in these spots can make them look unnatural.
The end is the most important step. Without adding more product to your tanning mitt, go over your feet blending well into the ankles, then hit the tops of the hands only once. Be sure to blend well into the creases of the knuckles and finally your face, blending well into the neck. Pro tip 4: use a kabuki brush to blend ankles, feet, wrists and hands!
Achieving the perfect sunless tan is easier than you might think! After doing this application more and more, it will become easier for you! By following these simple tips, you can avoid any potential disasters, and will end up with a beautiful, natural looking bronze complexion.
_edited.jpg)


Comments